
A square piece of cloth made of any fabric. It comes in all sizes from one foot square to ten times that size. It is the most useful carrying invention imaginable. It has been used since the 7th century to carry every object, from elaborate gifts to lunches, vegetables, books or even bulky furniture.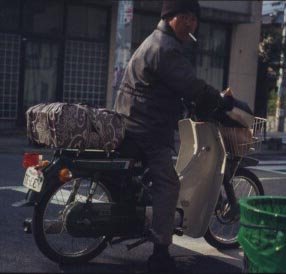
SHORT HISTORY
Perhaps the original idea of a furoshiki was introduced from China. In the 8th century, the square of cloth used to wrap things up was called hirazutsumi. Shosoin, the imperial treasure house in Nara, has in its collection, cloth used for wrapping.
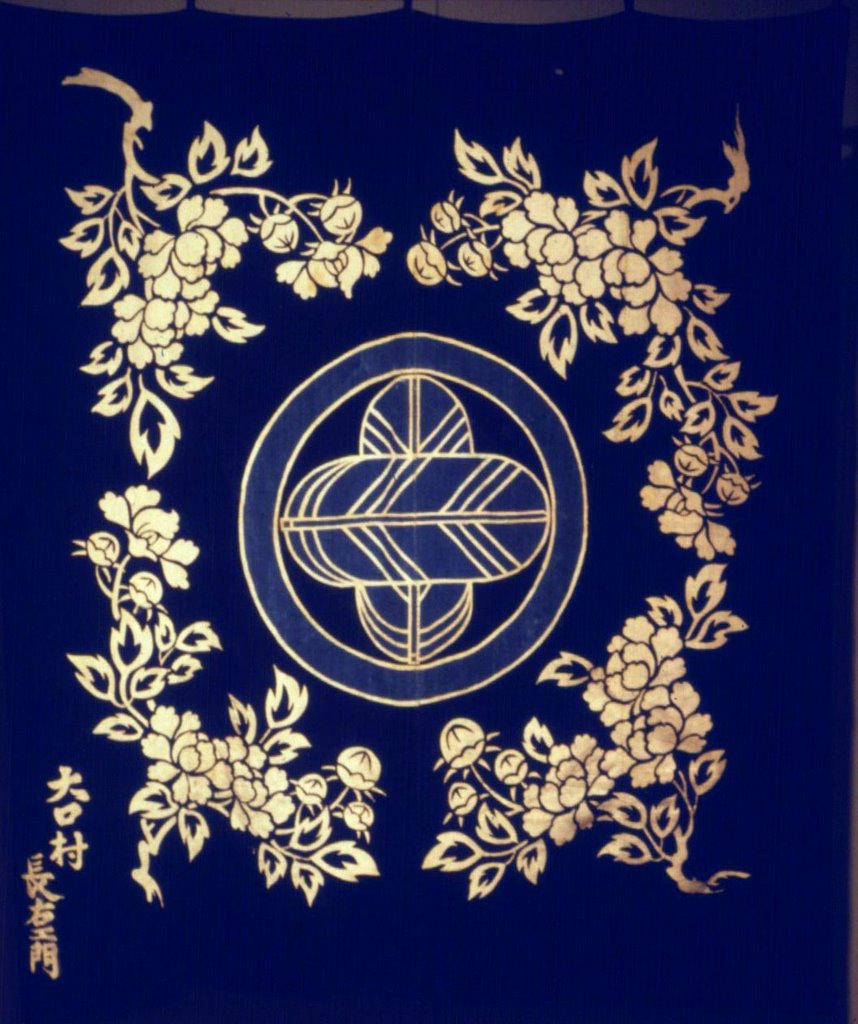
It is thought that hirazutsumi (just wrapping) might have been used in temples to store clothing, while bathing to purify the body before worshipping. In the 14th century, the practice of using hirazutsumi was also used by aristocrats as a method of wrapping their clothes. These hirazutsumi were decorated with family crests. The bathers in special, feudal, bath houses spread the cloth on the wet floors, placing their clothing on it and turning up the four corners over the center to keep the bundle together.
The first record mentioning furoshiki dates from the beginning of the 17th century. The word furoshiki originated from the public baths. During the early Edo Period, as the public bath, 0-Furo, was common to both men and women, they modestly entered clad in their underclothes. Each bather spread a hirazutsumi on the floor, much as a bath mat, and undressed on it. After bathing, they would wrap their wet underclothes and towels in the cloth to carry home. From this usage, the cloth became known as furoshiki, furo meaning bath and shiki meaning cloth or bath spread.
The convenience of the furoshiki, the simplicity with which it can be folded, placed in a purse, and used again and again, soon popularized it. The use of the furoshiki shifted from its original bathhouse use to the making of bundles for carrying goods, business documents, books, gifts , storing futon and for wrapping items during ceremonial occasions.
In Japan, the furoshiki has been the most popular method of carrying merchandise until the 20th century. A furoshiki can be carried on the shoulder, over an arm, in the hand, on the head or on the hips. Its specialized usage lead to the development of creative ways to wrap items. The Japanese have always been extremely dexterous with their hands, and in time the simple actions involved in the folding, wrapping or tying the furoshiki evolved into an important part of Japanese culture. A formal gift requires the closest attention to make sure that the container, wrapping and furoshiki fit the occasion for the gift they bear. This trait of evading directness, of keeping things under cover, has evolved from a very rigid social structure.
A characteristic peculiar to the Japanese is their abhorrence of carrying or storing things that are not covered. Even money must be wrapped in a suitable manner before it can be presented., regardless of how little the sum. A furoshiki wrapped item is a neat, creative way of packaging. The folding and stowing of the contents, are all done in a manner so as to please the eye, even after the packages have been opened. The versatility and convenience embodied in furoshiki are truly amazing in the manner they are employed. Objects of all sizes and shapes, thin, bulky, round, square or whatever, are easily accommodated in this piece of cloth which comes in a variety of sizes, but always in the familiar square shape. When not needed, it's simple to fold it up and tuck it into a handbag or pocket.
In the early days, the useful furoshiki was only a hemp or cotton mat. As time went on, and as the Japanese social structure became more complex and varied, the furoshiki assumed a more elegant and refined quality until the ultimate is produced in beautiful and gorgeous contemporary fabrics.
Today furoshiki come in a wide variety of materials. They can be made of silk or cotton, are often uniquely designed, woven and dyed with family colors, traditional crests or seasonal designs. Size and material depend on the purpose. Plastic furoshiki are used to protect merchandise from rain and dust. The furoshiki is a square piece of cloth made of any fabric, it comes in all sizes from one foot square to ten times that size.
The refined Japanese sense of color and all of the major trends of textile design are clearly stated in a study of furoshiki of the different eras. Masterpieces using the methods of Yuzen, Bingata, tie-dye, drawn silk and other artistic approaches to executing design are still to be found today. It is a treat to be able to browse through a shop displaying furoshiki, noting the various designs, from subdued to modern abstracts, eye catching colors and tints from the bright to the subdued
In Japan today, an occasional salesman can be seen lugging his wares in a furoshiki printed with his company's trade name in bold letters. Almost all Japanese cherish a memory or two of being summoned by their mother to greet a visitor in the living room and becoming excited to see what is in the furoshiki.
In the Edo Period, the well-dressed aspired to be shibui, smartly attired in an elegant manner. The furoshiki reflects this attitude very well in retaining its original purpose and practicality while evolving into a fine ornamental piece. Part of the joy of unwrapping a present contained in a furoshiki is that the furoshiki is revealed in its entirety. Attractive in concept and color, it offers a visual treat.
Now that the Japanese lifestyle has become so Westernized, furoshiki, the all purpose cloth, square, carry-all, seems to be giving way to the paper shopping bag. Although it is seldom carried today, the furoshiki in all its elegance and beauty, continues to be used on highly formal occasions.
Wednesday, July 26, 2006
WRAP / ARRANGE / BUNDLE / CARRY / PROTECT / CLOTH = FUROSHIKI

Sunday, July 09, 2006
DYEING WITH INDIGO USING THREE DIFFERENT PASTES
Stencil of Plovers by Atsuko Yoshida
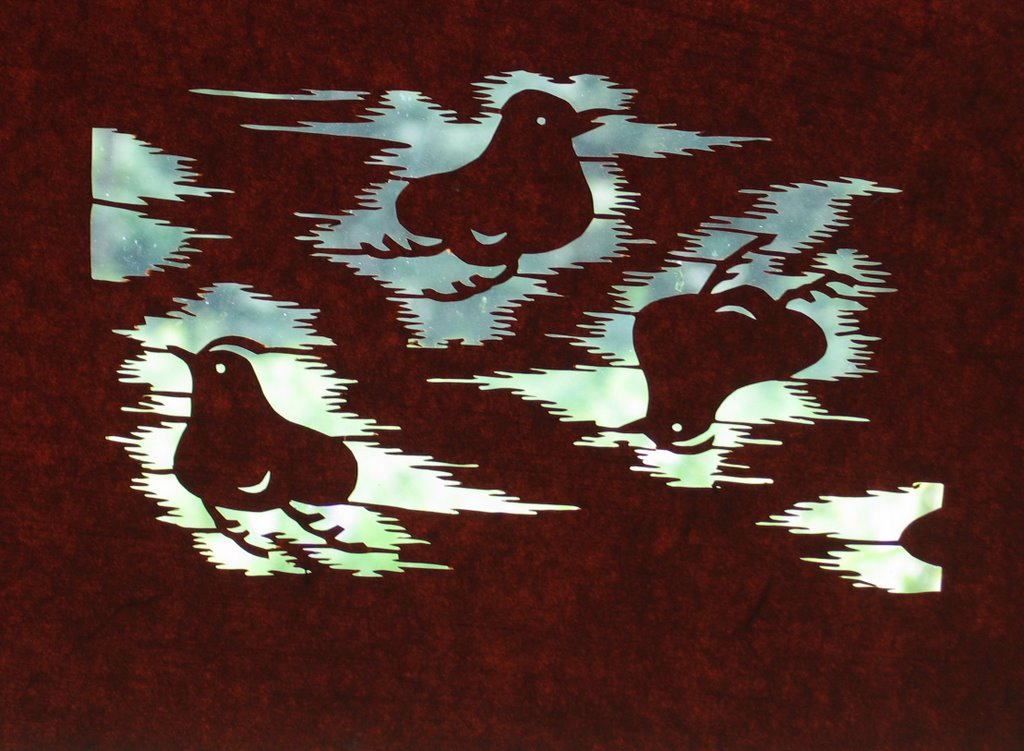
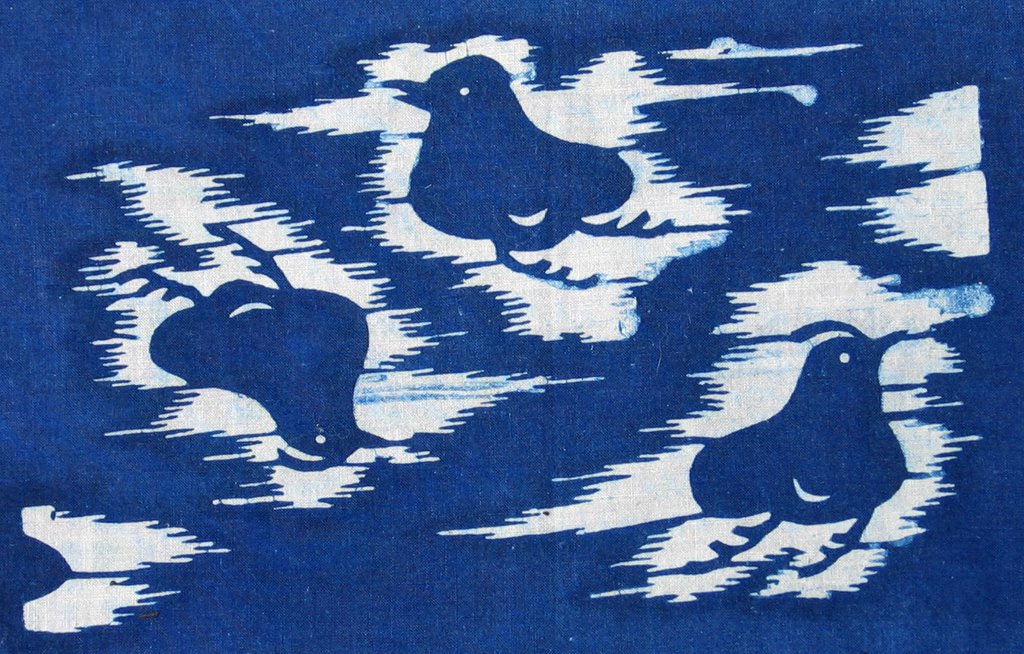
Japanese rice paste: Rice flour mixed with rice bran and lime.

Chinese stencil paste: Soy flour and lime.

Indonesian paste: Ground nuts (peanuts) and lime called katjang batik from Batavia (Djakarta), recipe from a citation in a "A History of Dyed Textiles" by Stuart Robinson, MIT Press, 1969, p. 74.
I used "Skippy" peanut butter mixed with lime.

Tuesday, July 04, 2006
AIGAESHI ONCE MORE
This fabric is dyed with the katazome stencil technique. It is called aigaeshi, meaning the fabric is totally dyed in different shades of indigo blue.
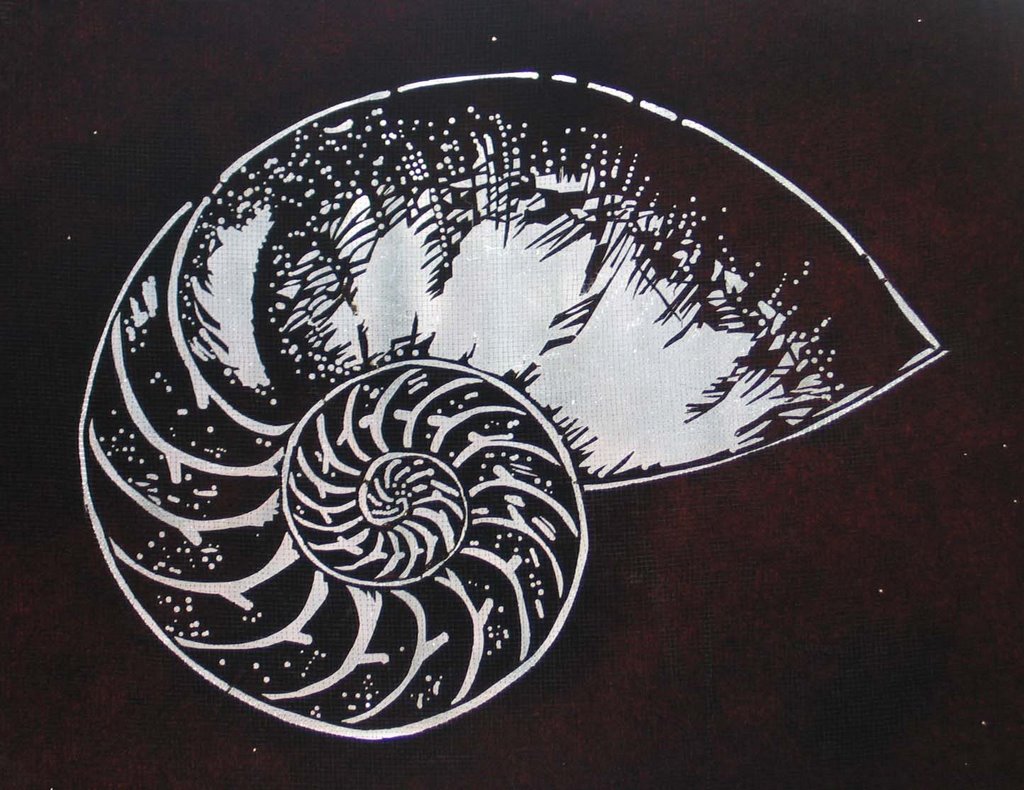 The stencil

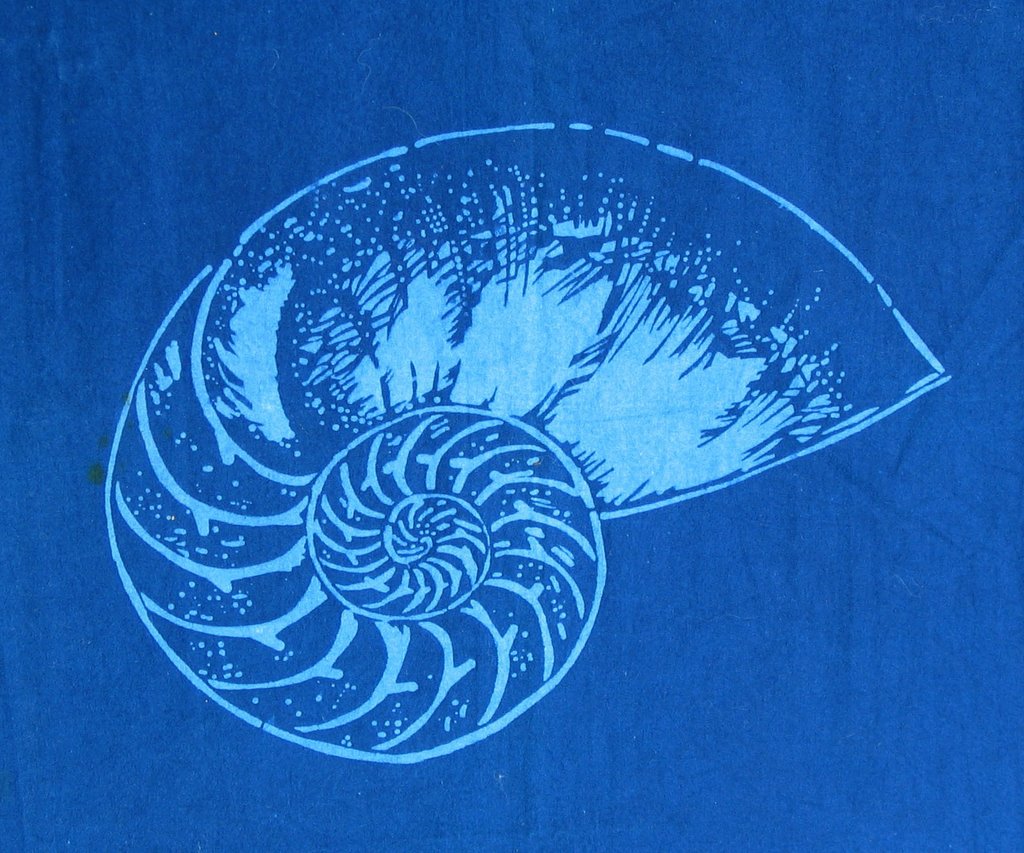
Tuesday, June 20, 2006
AIGAESHI
Aigaeshi is a Japanese technique of dyeing different shades of blue. Between each dip the rice paste is washed off the stencil. The fabric is dried then more rice paste can be applied with another stencil. The fabric is dipped again in indigo. This technique can be repeated. With careful planning two or possibly three shades of blue can be obtained.
Dyed with one shade of blue


A second example dyed with two shades of blue.
Monday, May 29, 2006
INDIGO DYE ON WOOD
This image of a crane was stenciled with the Japanese rice paste recipe and dipped into indigo three times.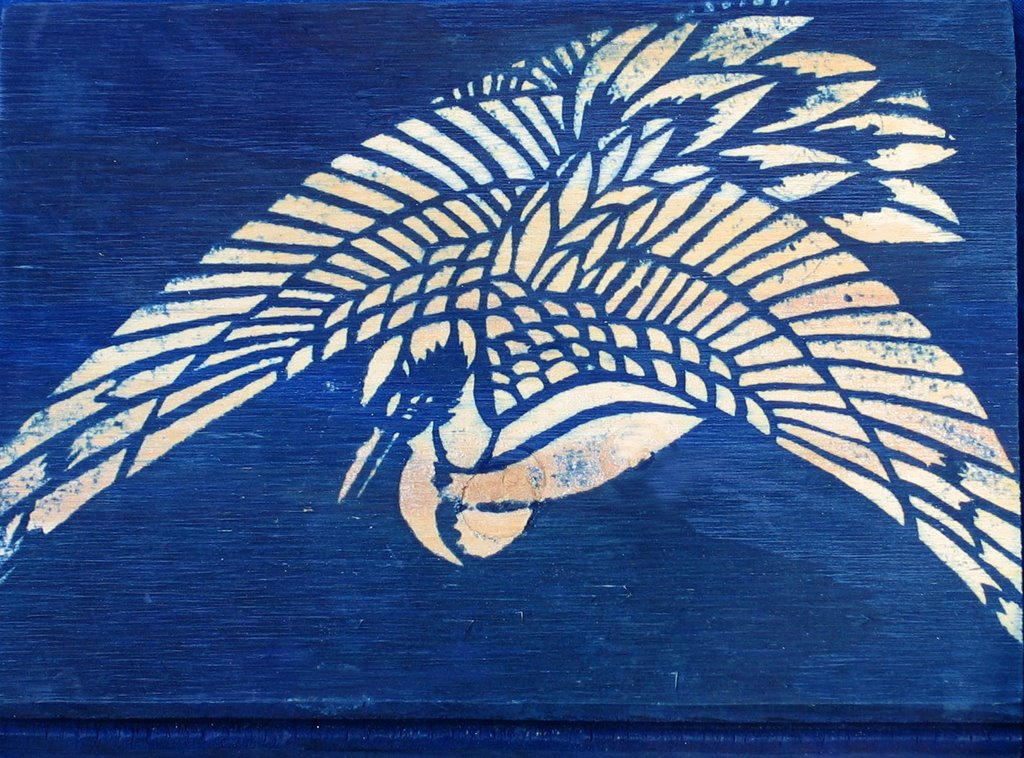
Thursday, April 27, 2006
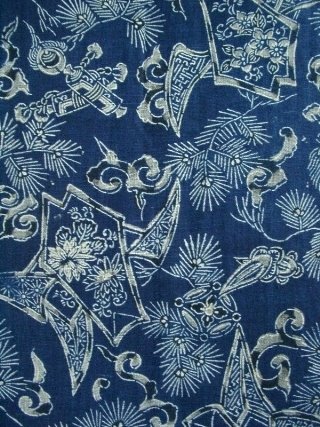
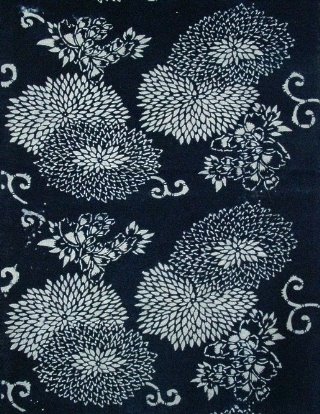
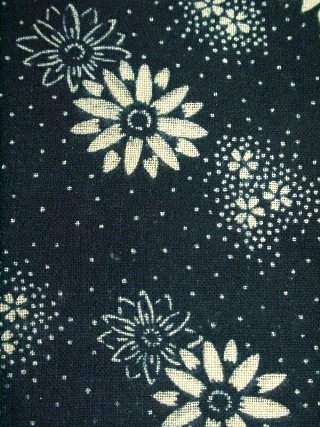
A SAMPLER OF INDIGO DYED FABRICS
These Japanese fabrics have been dyed with indigo using katazome (stencils) and rice paste resist.

.


Friday, April 14, 2006
MANY JAPANESE DYERS BELIEVE THAT THE
blue from indigo has been used for 1200 years and can protect people from sickness and calamity.
Japan indigo blue is used for work clothes.
Jeans dyed by Japanese Indigo can protect people from snakes and harmful spiders.
Japanese indigo is an insecticide that has the power to sterilize fabric.
Indigo does not affect birds or their young.
A kimono, dyed with indigo, when put in a closet will repel moths.
Underwear and socks dyed with indigo are good for prickly heat, skin eruptions, and skin disease.
When samurai wore clothes dyed in indigo it protected them against cuts and insect bites.
It is said that the smell of indigo can help people sleep. It is used for bed clothes, pillows, baby clothes, older people and people that are affected by the cold.
Japanese Indigo blue is good as an herbal medicine.
Travelers used indigo on trips. It cured globefish (fugu) poisoning, food poisoning and it was used to lower fevers.
In China it was used as a medicine for cancer of the esophagus.
Japanese indigo tea is good for one's health.
Japan indigo blue wears well because the fabric is protected by the fermentation process.
Kimono from the Nara period to the Edo period have survived because they have been dyed in indigo.
Indigo was used as the dye in fire fighters and locomotive engineer's uniform because it protected them from fire.
It was used as garments for fisherman because it protected them from the salt water and sea breezes.
Japan Indigo blue is good for the eyes. The older it gets the deeper the color.
Light reflected from Indigo is so soft that it makes beautiful pictures.
Japan blue doesn't loose its color by washing.
Japan indigo blue can be cleaned in benzene.
The Japanese indigo plant can clean up blood, alleviate fever, detoxifies, cures pneumonia, conjunctivius, eczema, throat inflammation, mouth inflammation, asthma, athlete's foot, ringworm, and prickly heat.
There are many benefits of the natural indigo plant.
Recieved from a store in Gion, Kyoto, Japan
Friday, March 24, 2006
PAPER KIMONO

Ouma Indigo Dye Studio, Tokyo Prefecture, Japan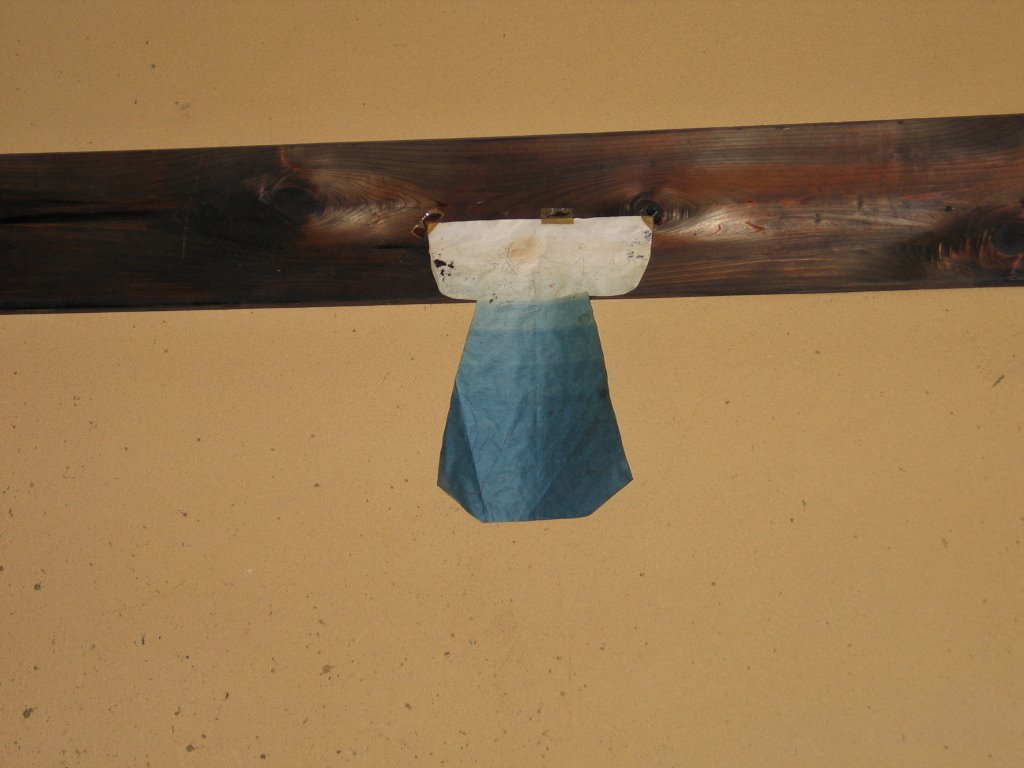
The koya (Indigo dyer) has the tradition of using a ritual paper kimono that is dipped in indigo for the first dyeing of the year. The first dyeing is called hatsu-zome.
Monday, March 20, 2006
WOODBLOCK OF INDIGO DYEING
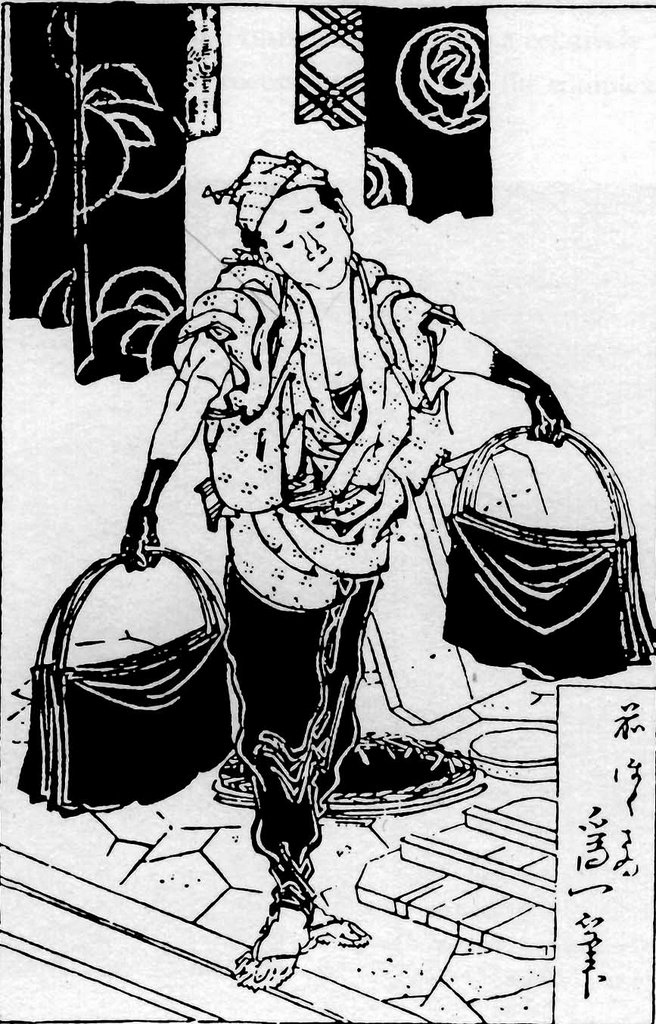
Indigo dyer, called a kon-ya in Japan, from a woodblock print in the book Shinagata komon-cho, by Hokusai Katsushika, 1824. The fabric is stretched on shinshi ready to be dipped into the indigo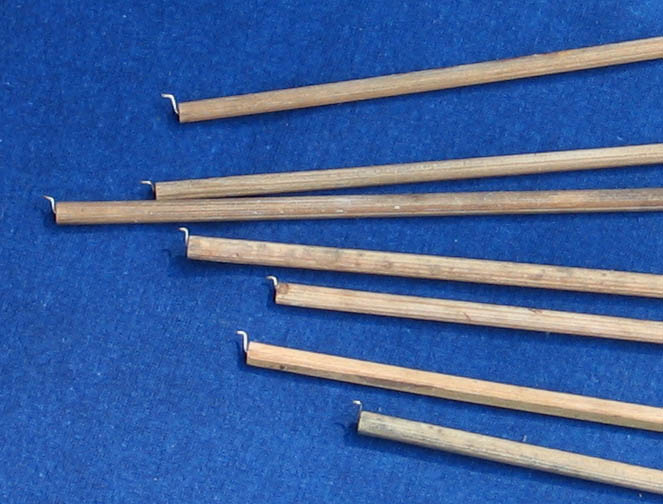
This type of shinshi is used in Japan for indigo dyeing. The little hooks on either end allow the fabric to hang from the shinshi while immersing into the dyepot
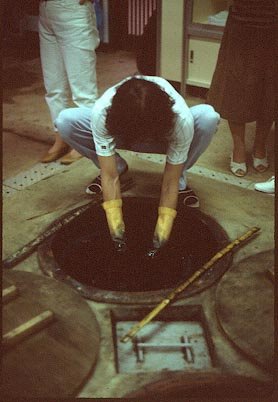
MURAL OF INDIGO DYEING

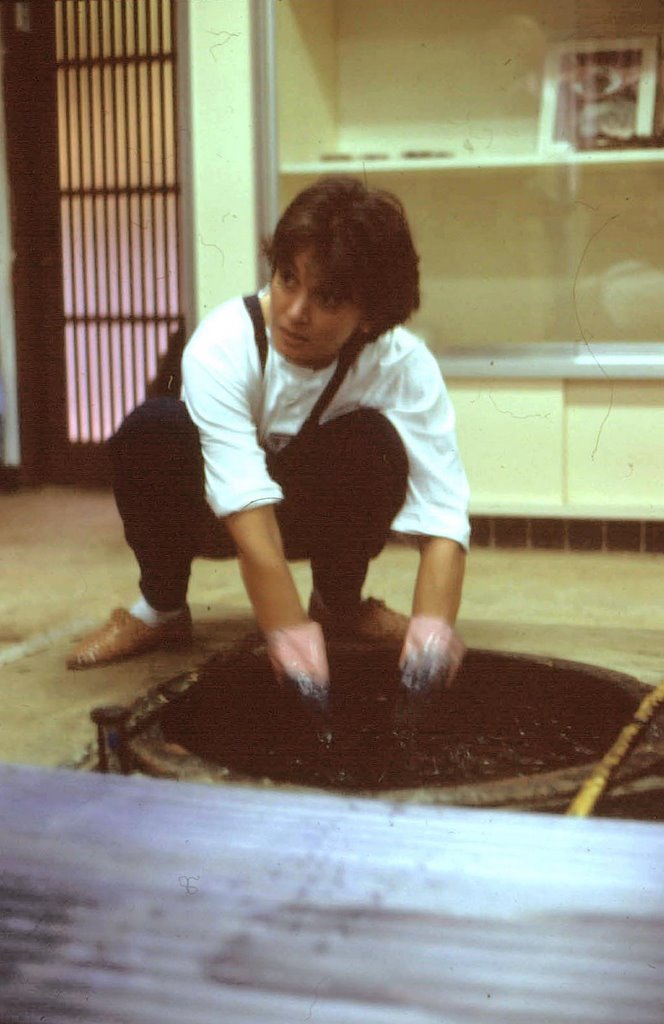
Dyeing with Indigo from a mural
by Diego Rivera, 1924, Ministry
of Education, Mexico City.
Wednesday, February 15, 2006
JAPANESE STENCIL PRINTING WORKSHOP
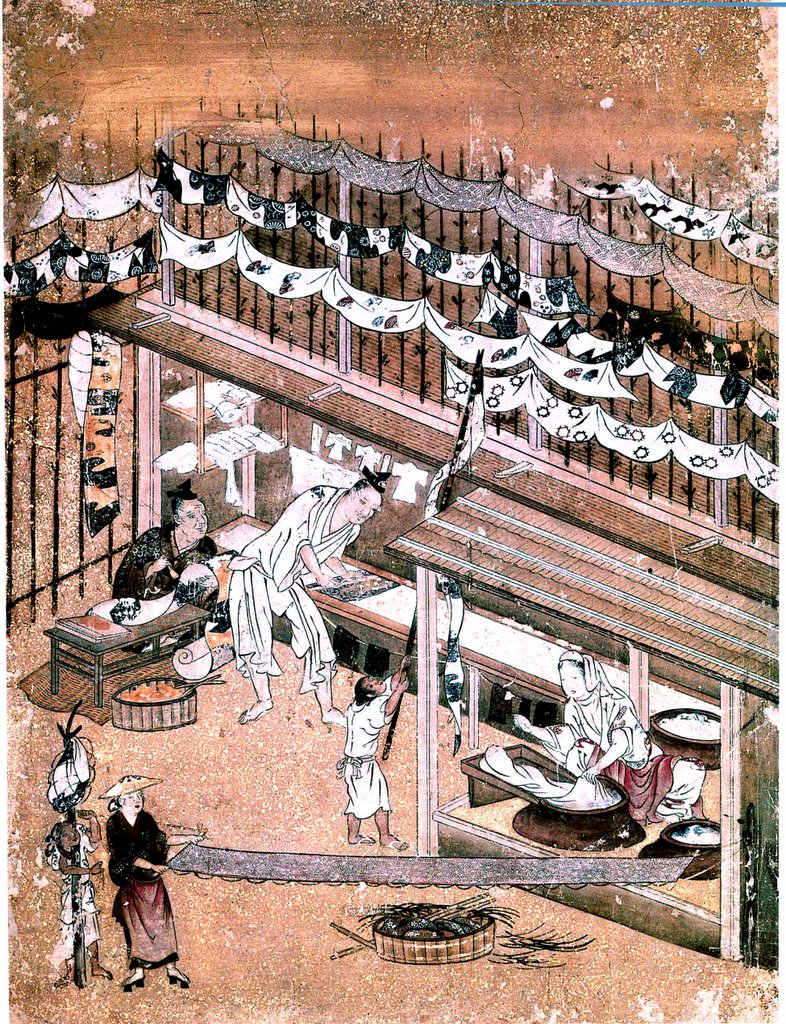
Print from a screen of artisans at work by Kano Yoshinobu (1552-1640)
From the "Folding Screen of Artisans", Kita'in Temple, Kawagoe-shi, Saitama-ken, Japan. This print shows scouring, stenciling, painting and drying fabric
Contemporary Japanese studios still use the same tools and processes.
Thursday, February 09, 2006
RICE PASTE RECIPE FOR STENCIL PRINTING
500 grams sweet rice flour (mochiko, Japanese sweet rice flour) *Important: Do not use any other kind of rice flour
500 grams rice bran (komon nuka)
If you prefer a stickier paste then try, 600 grams sweet rice flour to 500 grams rice bran
or an even stickier paste, 600 grams sweet rice flour to 400 grams rice bran
Add 20% salt to the combined parts of the flour and bran. This amount of salt is standard. The salt acts as a hydroscopic agent so the amount of salt added depends on the weather. During dry weather more salt should be added. During wet weather less salt should be added. The addition of the salt prevents the paste from cracking and over drying, allowing the dye to seep through the cracks.
Mix these three ingredients together while still dry.
-----------------------------------------------
SHINOZAKI MISAO MEASURING RICE PASTE INGREDIENTS AT YAMASAKI SEIJU STUDIO, TAKASAKI, JAPAN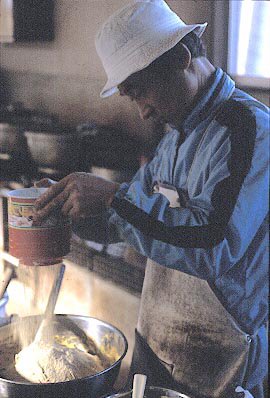
After dry mixing, add hot water little by little until all the flour is moistened. Gather the flour into a ball and knead well until the dough feels as soft as an ear lobe. Form into doughnuts.
Line a steamer with a moistened terry cloth towel. Layer the doughnuts in the steamer. The doughnuts can be piled one on top of the other. Wrap the towel over the top of the doughnuts and cover. Steam for 1 hour. The temperature should be kept as high as possible. If there are a lot of doughnuts, steam for a little longer. Check a few times to see that the water hasn't boiled away.
While the doughnuts are steaming prepare the calcium hydroxide.
------------------------------------------------
Dissolve 1 gram of calcium hydroxide (calx) in
100 cc of hot water
Stir. Keep this mixture hot. Allow the calx/water mixture to settle. Only the upper 70 cc. of the liquid will be used. The calcium hydroxide acts as a preservative, makes the paste less sticky and gives the paste body.
------------------------------------------------
Remove the doughnuts from the steamer. While still hot, quickly mash and work the doughnuts into a paste with a wooden pestle. This must be done while the paste is still hot. If allowed to cool the paste becomes unworkable. This part is hard work and may require two people, one to hold the bowl and another to mix and mash. One person can also do this by putting a towel on the floor, placing the bowl on the towel and gripping the bowl between their knees.
After mashing the paste for a few minutes, it will be very sticky. Slowly add hot water to the paste. A little at a time. After each addition of hot water make sure it is all mixed in before adding some more. At least 8 cupfuls of hot water might be added to the paste. When finished it will increase the volume of the paste by at least a half. Toward the end of the mashing process add the hot calcium hydroxide/water mixture a little at a time while continuing to mix and pound the paste. The more the paste is mashed the better it will be. As the calcium hydroxide is added, the paste will undergo a color change and turn yellow. Too much calcium hydroxide will make the paste too rubbery.
SHINOZAKI MISAO POUNDING STEAMED RICE PASTE AT YAMASAKI SEIJU'S STUDIO, TAKASAKI, JAPAN
As you work the paste it will gradually become very elastic and make a clicking sound. Mix for at least 10 minutes. Finally add about 60 cc. of glycerine. Although this is not necessary, the addition of glycerine will make the paste very smooth.
Sometimes it is difficult to see the pasted patterns on white cloth. The addition of one tablespoon of India ink to the paste allows it to become visible on the fabric. This makes it easier to paint the patterns.
When finished mixing, the paste will have the thick consistency of pound cake batter. A spoonful when lifted up and allowed to drop back in the bowl will fall like a ribbon, forming a mound that will flatten in a few seconds.
To store, use plastic wrap to cover the paste and refrigerate to keep. Sink the plastic wrap down into the bowl so that it touches the surface of the paste keeping the paste from forming skin. Because the paste spoils easily it should be used quickly. If kept too long it will lose it's elasticity and stickiness, while at the same time undergo a color change to a darker shade.
The life of the paste can be extended by adding a preservative (phenol). To restore the paste some calcium hydroxide can be added. The calcium hydroxide should be mixed with hot water. If it is added while powdered it will form lumps and be difficult to remove. The lumpy paste will not pass easily through the paper stencils.
For longer storage the paste may be frozen. After defrosting, if the paste seems too sticky, leave it out in the air stirring frequently to keep scum from forming. If the paste seems too hard, it may be reconditioned by putting it in a microwave until soft or steaming it in a double boiler until it is soft and sticky again. If a double boiler is not available put the paste in a bowl covered with a damp cloth. Immerse the bowl into a pan of boiling water and steam until soft. Stir until the paste is smooth and creamy. Cool off before using.
This recipe can be multiplied many times if desired. The amount of paste made by increasing the recipe many times may be difficult to mix by hand.
To prepare the fabric for stenciling, wash the fabric to remove all the sizing. This is very important. If all the sizing is not removed the fabric will not dye evenly. It might be necessary to wash the fabric at least two times. Iron the fabric after washing.
Adhere the fabric to the printing board. Use adhesive paste to stick the fabric to the board.
--------------------------------------------------
ADHESIVE PASTE: Sweet rice flour
Cold water
Boil water. Sift the rice flour into a bowl. The amount of rice flour will depend on how much adhesive paste needed. Add enough water to make workable dough. Don't make it too sticky. Make small 3 inch dumplings. Drop them carefully into boiling water. They will sink to the bottom of the pot and then as they cook they will gradually rise to the surface. As the doughnuts hit the surface of the water (about 7 minutes) remove them from the pot and immediately mash them. Gradually add some of the hot water, stirring constantly, until the paste is smooth, even and glossy. This paste will be thinner than the resist paste. Cool.
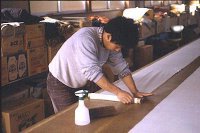
YAMASAKI TATEHIKO PREPARING THE PASTED BOARD WITH WATER THEN STRETCHING SILK. YAMASAKI SEIJU STUDIO, TAKASAKI, JAPAN
The adhesive should be spread onto the print paste board using a squeegee. Allow to dry. If applying to a new board several layers may have to be added. Before fastening the fabric, moisten slightly with a spray bottle of water. Spread the 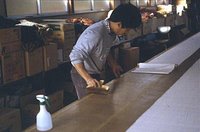 water evenly with a brush.
 -----------------------------
Before stenciling, soak katagami (the traditional, brown stencil paper) in water for 1/2 hour. Yokatagami (yellow chemical paper) or Shimaekatagami (the brown chemical paper) does not need to be soaked. Pat dry on both sides.
Position the stencil on the fabric and fasten with push pins or T-pins. The paste is applied in two separate layers. The second layer should be applied when the first layer is dried.
To apply the paste, hold the squeegee at a 45% angle, similar to the way ink is screen printed on fabric. When finished laying on the paste take off the stencil. Pull it off by picking up opposite corners and carefully removing them from the fabric. Allow to dry naturally or dry with a hair dryer. Return the stencil to the water to remove the excess paste or if rice paste has leaked through to the bottom of the stencil. If you work rapidly and the first layer is dried quickly, the paste will not dry on the stencil cloging the design.
While on the fabric, the paste from this point on is very fragile and cracks easily. It must be handled carefully and cannot be rolled or folded before dyeing.
The paste can be allowed to dry in three ways. It can be left to air dry on the board, it can be dried with a hair dryer or it can be carefully removed from the board, so that the paste is not disturbed and hung with clothes pins to dry.
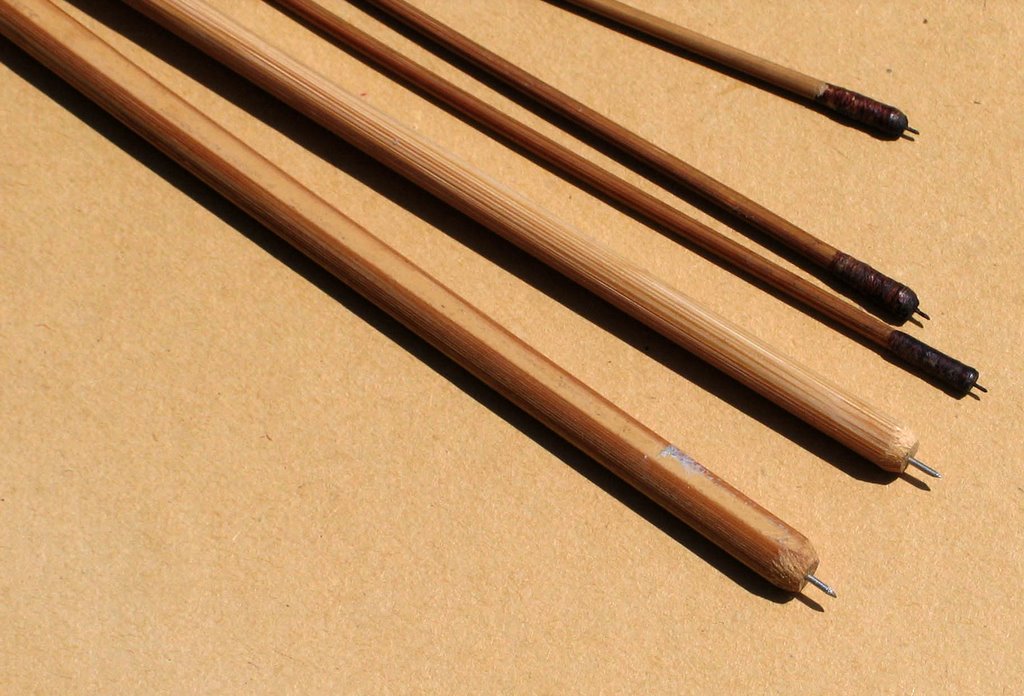
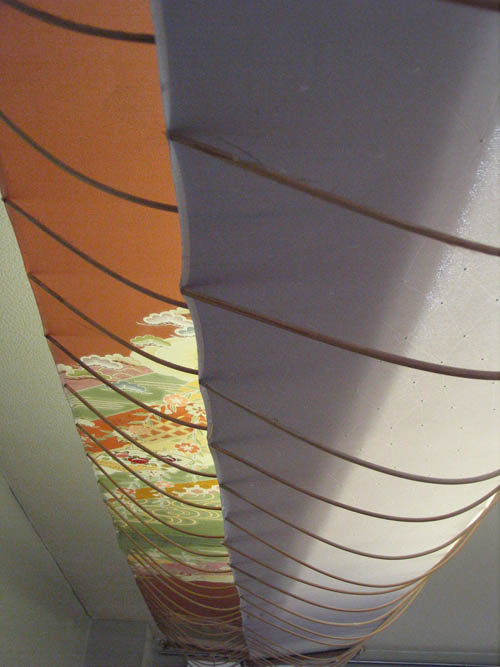
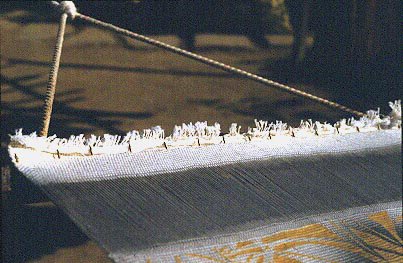
Before dyeing, attach the fabric to a frame or use harite (stretchers used in Japan for painting fabric) with shinshi. Shinshi are bamboo tenterhooks. Attach the tenterhooks to the selvedges of the fabric. Shinshi are also used to keep the fabric pulled tightly while stretched between harite.
Pigments or dye can be directly applied over the paste using brushes. Some pigments are not suitable because they leave a rubbery skin over the paste. Test pigments and textile paints before using. If natural dyes are used follow the notes for applying natural dyes to fabric. If using synthetic dyes, follow the instructions for the direct application of that particular dye to fabric.
If steaming is required after drying and curing the dye, remove the paste from the fabric after steaming. Remove the paste from the fabric by soaking it in water for 1/2 to 1 hour. Rinse the fabric according to the dyes that you are using. Use dish soap, Woolite or Synthrapol.
© Copyright M. Joan Lintault
Wednesday, February 08, 2006


Tuesday, February 07, 2006
INDIGO DYE RECIPE
INGREDIENTS:
WATER: Used as the dye vehicle.
SALT: Used to accelerate dyeing and to encourage the indigo to bond to the fibers.
THIOUREA DIOXIDE: Because of it's stability it is used instead of sodium hydrosulfite. Thiourea dioxide reduces the indigo. The action of the thiourea dioxide liberates the hydrogen, which combines with the indigo converting it to indigo white. In other words, the thiourea dioxide takes up the oxygen from the water, freeing the reducing agent hydrogen. The hydrogen reacts and joins with the double bonded oxygen in the indigo, forming a new series of internal bonds. It is sometimes said that it removes the oxygen from the dye bath.
In the presence of oxygen again, the two hydrogens attached to the indigo white molecule, leave the indigo white and return to indigo blue.
LYE: Known as caustic soda or sodium hydroxide. It functions as the alkali and dissolves the indigo white. "Red Devil Lye" is no longer available and substitutes available in the stores give unsatisfactory results both in color and the behavior in the dye pot. Lye for indigo dyeing can be purchased from Pro-Chemical and Dye Company, 1-800-2-BUY-DYE, and on the web at, http://www.prochemical.com/catalog/indigo.htm
SYNTHETIC INDIGO: A manufactured indigo whose chemical composition is similar to natural indigo. It has a uniform quality and is richer in indican than natural indigo.
Indigo can dye any natural fiber with slight alterations in the procedure. Because of the extreme alkalinity of the indigo dye pot, wool and silk must be handled with extreme care. Both fibers should be dyed in a low alkaline bath and neutralized soon after oxidation.
SAFETY: Before starting, put on respirator with a filter that protects against organic gasses, goggles to protect eyes, and heavy chemical resistant gloves. Mix the indigo stock in a well-ventilated area.
During the summer the indigo can be kept outside, in a shady place. During the winter keep the pot in the warmest spot possible the place should have very good ventillation. If the pot does not work at room temperature you might have to purchase an immersion heater. A pet store sells aquarium heaters that work well for this purpose. The temperature should be between 90-110 degrees.
For a 44-gallon plastic garbage can: This size plastic garbage can is useful because of its depth and width. Thirty-six inch stenciled fabric can be dipped into the vat without crowding. The recipe can be adjusted to a more convenient size vat.
WHAT HAPPENS IN THE DYE POT:
Indigo is insoluble in water. Fibers cannot be successfully dyed by indigo without assistants. The only way fiber can be dyed with indigo is through chemical reactions in the dye pot. There are two basic methods to immersion dye with indigo, reduction and fermentation
1. Reduction vat. This method involves using caustic chemicals such as sodium hydrosulfite (a reducing agent) and sodium hydroxide (an alkali). The addition of these two chemicals causes all the oxygen in the dye pot to be removed. The rapid utilization of oxygen and its removal from the dye pot causes free hydrogen. This hydrogen combines with indigo. When the fabric is dipped into the dye pot the indigo migrates onto the fabric. The blue color develops only after the fabric has been removed from the dye pot. Exposed to the air, the oxygen again locks onto the hydrogen rendering the color insoluble once more. The chemicals for this type of vat are quite caustic and potentially dangerous. Good ventillation is a must.
2. The second method of indigo dyeing is a more benign method. This method is quite lengthy and time consuming. In Japan indigo has been traditionally used in a fermentation vat. The Indigo plant is composted to remove the organic matter while preserving the dye. This composted plant matter is called sukumo. Sukumo has a high concentration of hydrogen producing bacteria necessary for fermentation. The indigo dyer only needs to provide "food" for the bacteria in the proper amount, at the proper time, at the proper temperature to make the dye work. Feeding the indigo dye pot is an art. Learning the skills to manage this type of vat can only be acquired by first hand experience. The konya-san (indigo-dyer) will use their fingers, eyes, nose and even the tip of their tongue to test the condition of the dye. The dye pot needs daily attention, constant temperature and takes on the aspect of a living being. The dye pot is often fed sake, oatmeal, or rice bran. In addition, an alkali leached from wood ashes is also added to the dye pot. Many things can go wrong to stop the process.
TO MAKE THE INDIGO VAT:
Sprinkle 8 tablespoons thiourea dioxide onto the surface of 38 gallons of water. Mix gently, do not add bubbles.
Dissolve in a plastic bucket.
2 gallons water.
12 cups salt.
6 cups thiourea dioxidemust be added first.
Only after thiourea dioxide is disolved then the 4 cups lye should be added. The lye should be dissolved in 8 cups (2 quarts) water.
Add each ingredient separately, stirring gently after each addition.
Add 8 to 10 cups (about 1 and 1/2 lbs to 2 lbs) indigo to the chemicals a spoon full at a time. Stirring after each addition. The indigo is very hard to mix with water, as it does not dissolve. It will take a few minutes to mix with the other chemicals. When completely mixed with the chemicals, the indigo will appear a dark yellowish-brown beneath the surface. The surface will be a dark coppery blue with lots of coppery foam. The foam is just oxygenated indigo that will be skimmed aside before dipping. Cover and let rest for 10 minutes.
Then.
Lower the bucket of indigo stock into the garbage can and empty it without splashing. Just gently let the indigo flow out into the water. Stir gently with a long wooden pole that reaches to the bottom of the pail. Let it rest for 1/2 hour. Then cover the dye pot with a piece of plastic by sinking the plastic down onto the surface of the indigo. This seals out all the oxygen. Fasten it around the rim with clothespins or a large bungee cord.
Skim aside the coppery foam before immersing anything into the indigo. The PH should be about 9.5-10, although the Japanese think the the best dyeing happens between 10.6 to 12.6
After each use, the dye pot should be covered with plastic that seals the surface of the indigo from interaction with the air. Make sure the depot is always covered after each use. This step is very important and will keep the dye pot strong for about two weeks of daily use.
If the pot has been used heavily it will get weaker with use. There will have been the introduction of oxygen and the dye pot will die. The indigo depot is dead when a glass of dye reveals nothing but blue particles. The dye should appear a yellowish-green. The pot can usually be revived at this time by adding more chemicals.
TO SHARPEN THE POT:
If more water is needed in the dye pot, the best time to add it is before this new round of chemicals.
Mix together:
2 quarts of water.
8 teaspoons thiourea dioxide (reducing agent, used instead of sodium hydrosulphite because of its stability).
8 teaspoons of lye (alkali, caustic soda, sodium hydroxide)
Add to the indigo dye pot. Check the color with a glass. If there are any blue particles in the water, add another round of chemicals.
You can tell if more indigo is needed, by looking at the amount of blue particles or color in the dye pot. If more indigo is needed add another round of stock solution. You may also halve the amount of indigo and chemicals if you feel that there is enough indigo left from the previous batch.
Dipping apparatus: All fabrics and yarns should be washed before stenciling and dyeing. Put yarn on a rod, shirts, pants and other articles of clothing on a plastic hanger, fabric should be clipped with a clothes pin to a plastic hanger, yardage should be accordion pleated back and forth and clipped with clothes pins to plastic hangers. If the fabric has a tendency to float up when dipping into the vat, attach fishing weights or clothespins to the bottom edge before dyeing.
Wetting-out: Wet-out all yarns and tie-dyes in water. The water in the fibers helps the indigo to move onto the fabric. When the fabric is on the dipping apparatus, wet-out the fabric with a gentle spray from a hose.
PROCEDURE:
1. Lower or slide the goods into the indigo vat. It is very important that this be done slowly and gently so as to not introduce any surplus air
2. The goods should be immersed in the dye for about 1 to 5 minutes depending on whether tie-dye, yarn, or pasted fabric is being dyed. Make sure the goods stay about 5 inches below the surface of the indigo. Do not raise and lower into and out of the vat.
3. Carefully raise the goods out of the vat and let it oxidize in the air. It will have a yellowish, than a greenish tinge when first removed from the dye. It will turn completely blue when oxidation is complete. It is not necessary to let the goods dry between dipping. If in a hurry it's a good idea to let the goods oxidize at least for one hour. A good rule of thumb is to dip the goods once a day. Except for tie-dye, it is important to hang up and open out the dyed goods.
The depth of color is obtained by repeated dipping into the vat after oxidation is complete. Lengthening the amount of time the goods are immersed will not darken the color. The amount of time between dipping depends on the amount of moisture in the atmosphere, the thickness of skeins, the type of fiber, etc. Usually 1 hour is a good amount of time for oxidation. The minimal oxidation time is 1/2 hour; some dyers feel that as much as one week between each dipping is not unusual.
Stenciled fabric can only be dipped 4 times before the rice paste breaks down. Tie-dye and yarns can be dipped as many as 6 or 7 times for a very deep blue.
RINSING: Indigo dyed fabrics should be rinsed in warm water until the water runs clear.
SOAPING: It is important to wash the indigo in a bath of hot water and synthrapol. This hardens the color.
BRIGHTENING BATH: Soak the fabric in a hydrogen peroxide / water mixture for 10 minutes. Add about 1/8 cup hydrogen peroxide to 1 1/2 gallons of water. This will brighten the indigo and make it seem to bloom. This step will make the indigo have a purple tint.
NEUTRALIZING BATH: Dip the fabric in vinegar water for 10 minutes. About 1/4 cup to about 1 1/2 to 2 gallons of water. The vinegar helps to neutralize the harsh chemicals. Rinse.
ANTI-CROCKING: Soak in a mixture of 10% liquitex to water for 10 minutes. Soaking in the liquitex mixture leaves a deposit on the indigo that will help to resist crocking. The liquitex soaking is not essential but nice. Do not rinse after this step. Dry.
CARE OF INDIGO DYED FABRICS: Do not wash indigo dyed fabrics in laundry detergent. Laundry detergent creates a similar environment as the indigo dye pot and will strip the color from the fabric. Use soap such as "Woolite", "Synthrapol", and “Joy" or "Palmolive" dish soap.
© Copyright M. Joan Lintault,
Saturday, January 28, 2006
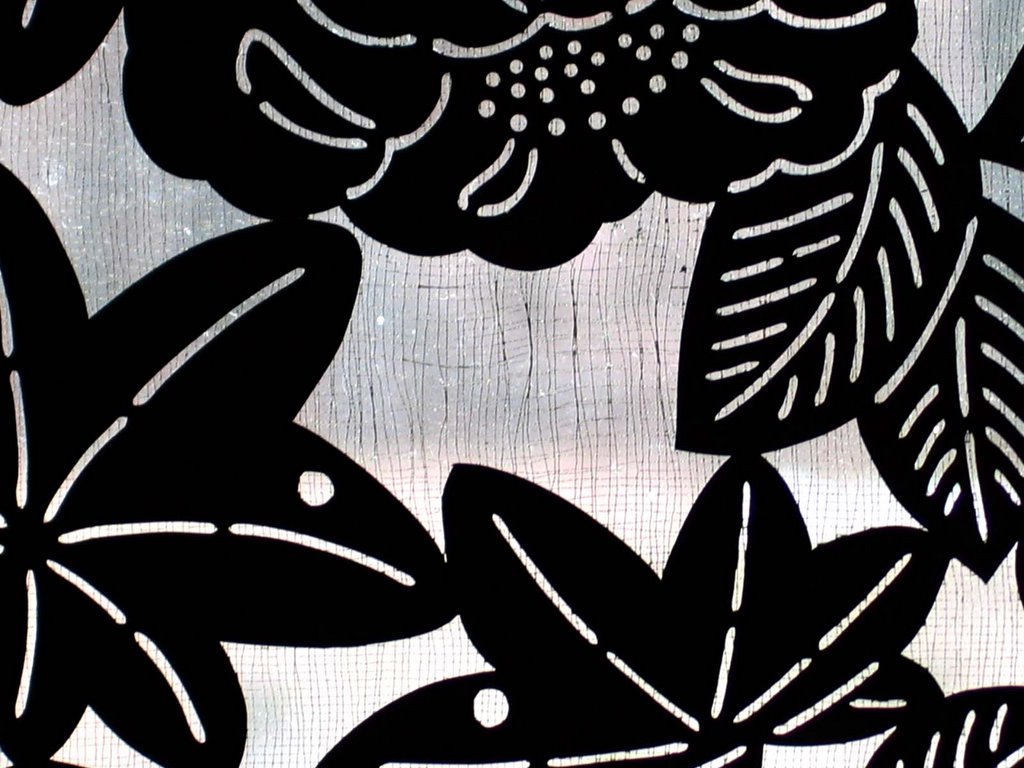
STENCIL REINFORCED WITH FINELY WOVEN SILK
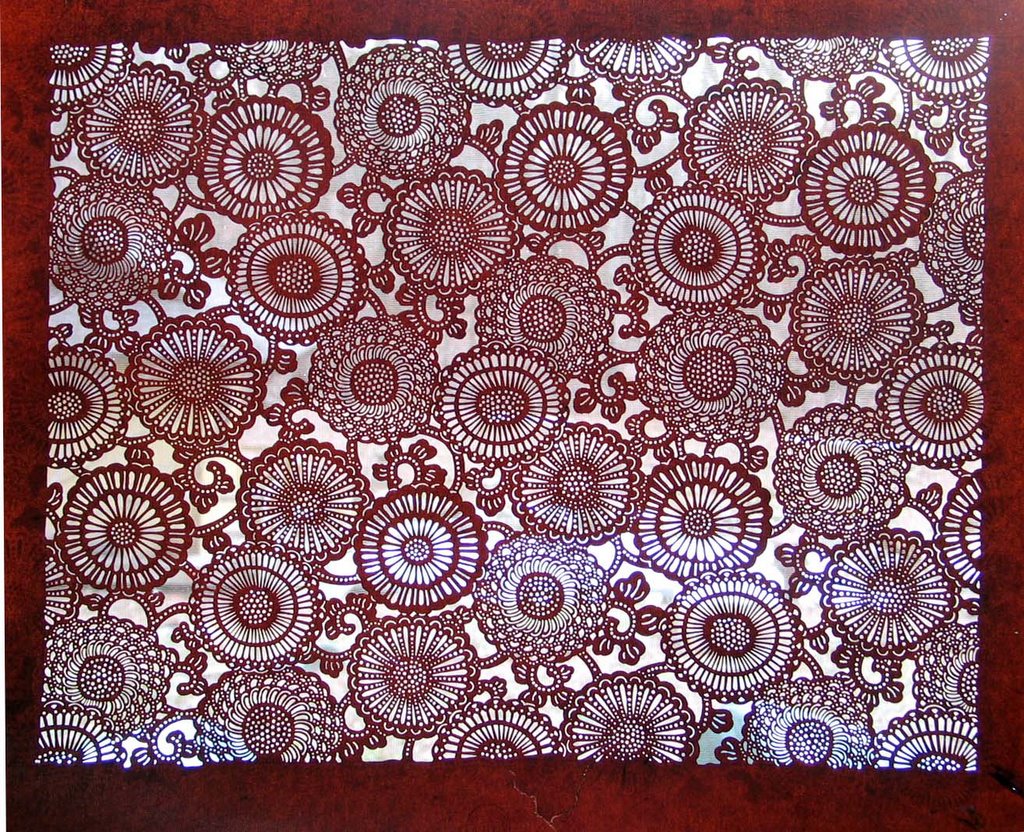
Stencils with complicated designs need a reinforcement of finely woven silk (sha) to hold the fragile parts together and to keep some of the design elements from falling out. In some stencils small paper bridges are worked into the pattern and become an element of the design. This stencil of camellia, chrysanthemums and maple leaves is reinforced with sha.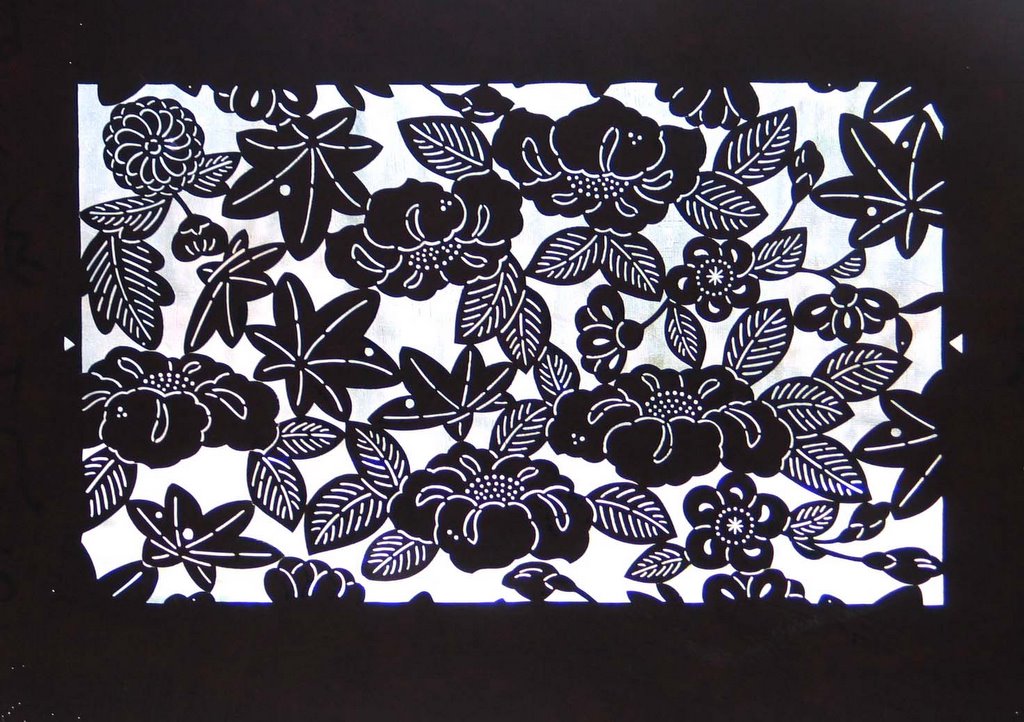
Thursday, January 26, 2006


Tuesday, January 17, 2006
CARVING KATAZOME STENCILS, NAGOYA JAPAN
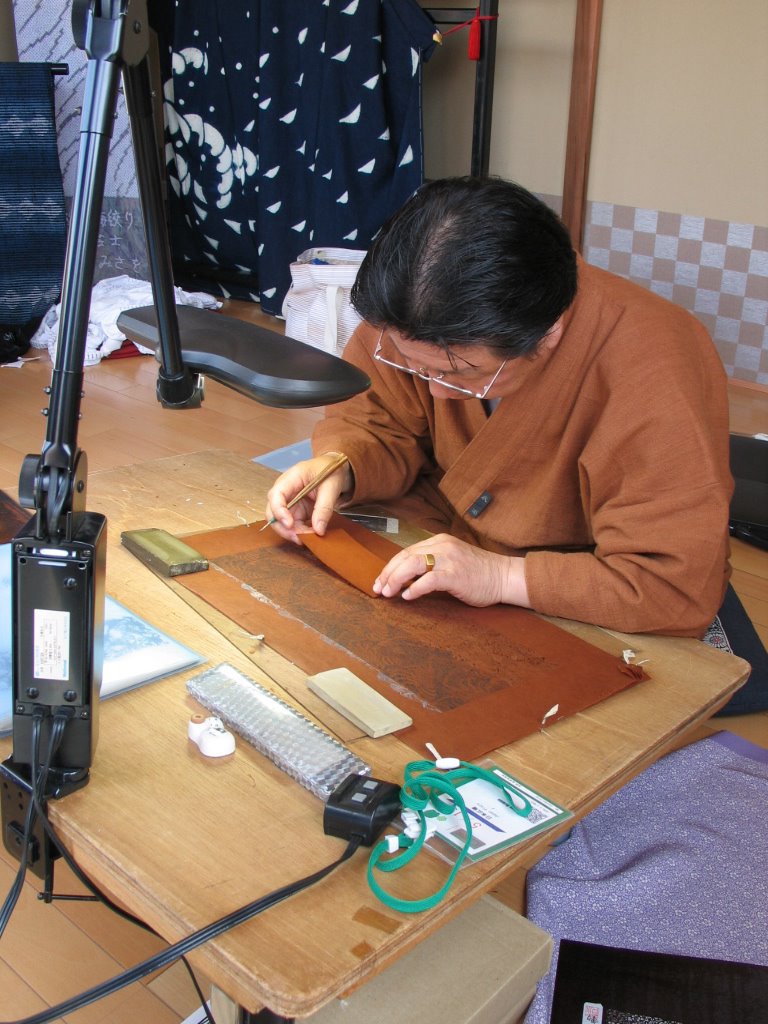
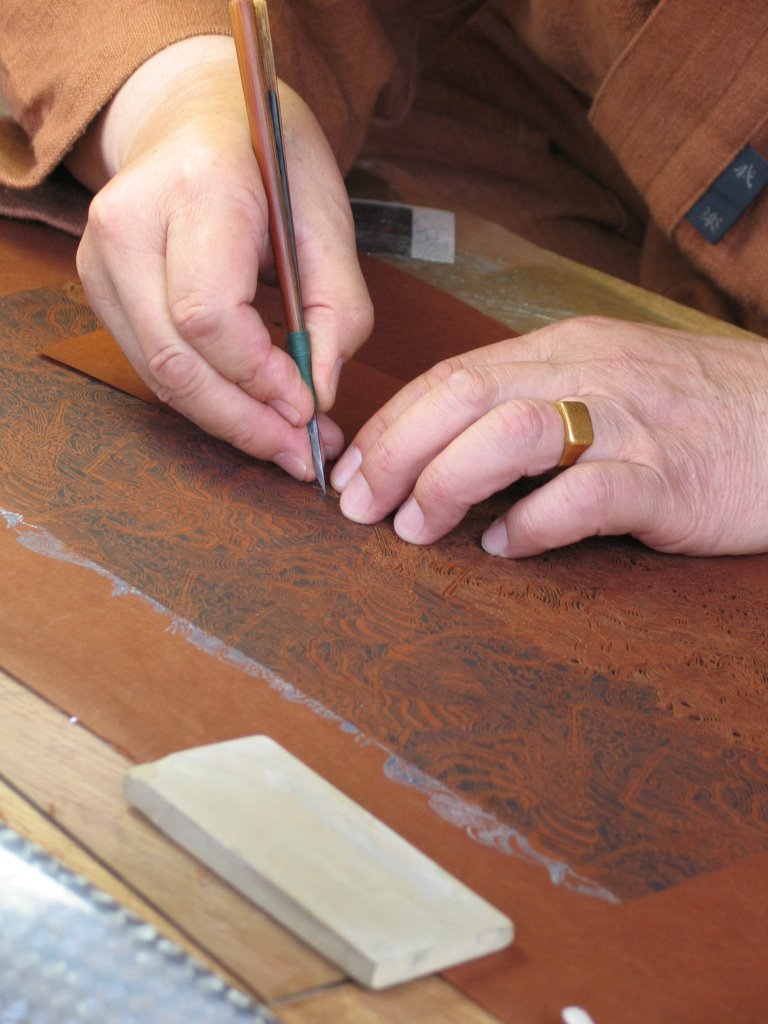
Paper stencils are used in Japan for resist patterns. This is known as the katazome process. Rice paste is applied through the stencil onto the fabric. Then the dye is brushed on or it is dyed in indigo. The rice paste resists the dye.
The paper (katagami) used for katazome is called shibugami. It undergoes a long process to make the paper relatively waterproof and malleable. Two or more pieces of paper are laminated with the tannin-rich persimmon juice then cured and smoked in a kiln.
A stencil artisan is a highly specialized master, he might specialize in a certain design or technique. Special tools are used for carving and punching.





