
500 grams sweet rice flour (mochiko, Japanese sweet rice flour) *Important: Do not use any other kind of rice flour
500 grams rice bran (komon nuka)
If you prefer a stickier paste then try, 600 grams sweet rice flour to 500 grams rice bran
or an even stickier paste, 600 grams sweet rice flour to 400 grams rice bran
Add 20% salt to the combined parts of the flour and bran. This amount of salt is standard. The salt acts as a hydroscopic agent so the amount of salt added depends on the weather. During dry weather more salt should be added. During wet weather less salt should be added. The addition of the salt prevents the paste from cracking and over drying, allowing the dye to seep through the cracks.
Mix these three ingredients together while still dry.
-----------------------------------------------
SHINOZAKI MISAO MEASURING RICE PASTE INGREDIENTS AT YAMASAKI SEIJU STUDIO, TAKASAKI, JAPAN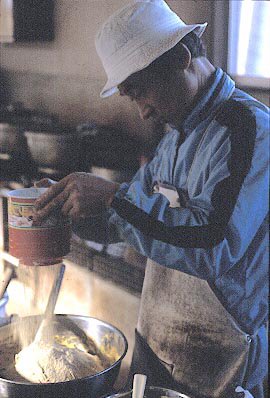
After dry mixing, add hot water little by little until all the flour is moistened. Gather the flour into a ball and knead well until the dough feels as soft as an ear lobe. Form into doughnuts.
Line a steamer with a moistened terry cloth towel. Layer the doughnuts in the steamer. The doughnuts can be piled one on top of the other. Wrap the towel over the top of the doughnuts and cover. Steam for 1 hour. The temperature should be kept as high as possible. If there are a lot of doughnuts, steam for a little longer. Check a few times to see that the water hasn't boiled away.
While the doughnuts are steaming prepare the calcium hydroxide.
------------------------------------------------
Dissolve 1 gram of calcium hydroxide (calx) in
100 cc of hot water
Stir. Keep this mixture hot. Allow the calx/water mixture to settle. Only the upper 70 cc. of the liquid will be used. The calcium hydroxide acts as a preservative, makes the paste less sticky and gives the paste body.
------------------------------------------------
Remove the doughnuts from the steamer. While still hot, quickly mash and work the doughnuts into a paste with a wooden pestle. This must be done while the paste is still hot. If allowed to cool the paste becomes unworkable. This part is hard work and may require two people, one to hold the bowl and another to mix and mash. One person can also do this by putting a towel on the floor, placing the bowl on the towel and gripping the bowl between their knees.
After mashing the paste for a few minutes, it will be very sticky. Slowly add hot water to the paste. A little at a time. After each addition of hot water make sure it is all mixed in before adding some more. At least 8 cupfuls of hot water might be added to the paste. When finished it will increase the volume of the paste by at least a half. Toward the end of the mashing process add the hot calcium hydroxide/water mixture a little at a time while continuing to mix and pound the paste. The more the paste is mashed the better it will be. As the calcium hydroxide is added, the paste will undergo a color change and turn yellow. Too much calcium hydroxide will make the paste too rubbery.
SHINOZAKI MISAO POUNDING STEAMED RICE PASTE AT YAMASAKI SEIJU'S STUDIO, TAKASAKI, JAPAN
As you work the paste it will gradually become very elastic and make a clicking sound. Mix for at least 10 minutes. Finally add about 60 cc. of glycerine. Although this is not necessary, the addition of glycerine will make the paste very smooth.
Sometimes it is difficult to see the pasted patterns on white cloth. The addition of one tablespoon of India ink to the paste allows it to become visible on the fabric. This makes it easier to paint the patterns.
When finished mixing, the paste will have the thick consistency of pound cake batter. A spoonful when lifted up and allowed to drop back in the bowl will fall like a ribbon, forming a mound that will flatten in a few seconds.
To store, use plastic wrap to cover the paste and refrigerate to keep. Sink the plastic wrap down into the bowl so that it touches the surface of the paste keeping the paste from forming skin. Because the paste spoils easily it should be used quickly. If kept too long it will lose it's elasticity and stickiness, while at the same time undergo a color change to a darker shade.
The life of the paste can be extended by adding a preservative (phenol). To restore the paste some calcium hydroxide can be added. The calcium hydroxide should be mixed with hot water. If it is added while powdered it will form lumps and be difficult to remove. The lumpy paste will not pass easily through the paper stencils.
For longer storage the paste may be frozen. After defrosting, if the paste seems too sticky, leave it out in the air stirring frequently to keep scum from forming. If the paste seems too hard, it may be reconditioned by putting it in a microwave until soft or steaming it in a double boiler until it is soft and sticky again. If a double boiler is not available put the paste in a bowl covered with a damp cloth. Immerse the bowl into a pan of boiling water and steam until soft. Stir until the paste is smooth and creamy. Cool off before using.
This recipe can be multiplied many times if desired. The amount of paste made by increasing the recipe many times may be difficult to mix by hand.
To prepare the fabric for stenciling, wash the fabric to remove all the sizing. This is very important. If all the sizing is not removed the fabric will not dye evenly. It might be necessary to wash the fabric at least two times. Iron the fabric after washing.
Adhere the fabric to the printing board. Use adhesive paste to stick the fabric to the board.
--------------------------------------------------
ADHESIVE PASTE: Sweet rice flour
Cold water
Boil water. Sift the rice flour into a bowl. The amount of rice flour will depend on how much adhesive paste needed. Add enough water to make workable dough. Don't make it too sticky. Make small 3 inch dumplings. Drop them carefully into boiling water. They will sink to the bottom of the pot and then as they cook they will gradually rise to the surface. As the doughnuts hit the surface of the water (about 7 minutes) remove them from the pot and immediately mash them. Gradually add some of the hot water, stirring constantly, until the paste is smooth, even and glossy. This paste will be thinner than the resist paste. Cool.
YAMASAKI TATEHIKO PREPARING THE PASTED BOARD WITH WATER THEN STRETCHING SILK. YAMASAKI SEIJU STUDIO, TAKASAKI, JAPAN
The adhesive should be spread onto the print paste board using a squeegee. Allow to dry. If applying to a new board several layers may have to be added. Before fastening the fabric, moisten slightly with a spray bottle of water. Spread the 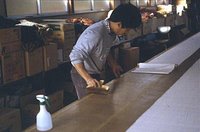 water evenly with a brush.
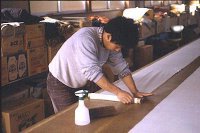 -----------------------------
Before stenciling, soak katagami (the traditional, brown stencil paper) in water for 1/2 hour. Yokatagami (yellow chemical paper) or Shimaekatagami (the brown chemical paper) does not need to be soaked. Pat dry on both sides.
Position the stencil on the fabric and fasten with push pins or T-pins. The paste is applied in two separate layers. The second layer should be applied when the first layer is dried.
To apply the paste, hold the squeegee at a 45% angle, similar to the way ink is screen printed on fabric. When finished laying on the paste take off the stencil. Pull it off by picking up opposite corners and carefully removing them from the fabric. Allow to dry naturally or dry with a hair dryer. Return the stencil to the water to remove the excess paste or if rice paste has leaked through to the bottom of the stencil. If you work rapidly and the first layer is dried quickly, the paste will not dry on the stencil cloging the design.
While on the fabric, the paste from this point on is very fragile and cracks easily. It must be handled carefully and cannot be rolled or folded before dyeing.
The paste can be allowed to dry in three ways. It can be left to air dry on the board, it can be dried with a hair dryer or it can be carefully removed from the board, so that the paste is not disturbed and hung with clothes pins to dry.
Before dyeing, attach the fabric to a frame or use harite (stretchers used in Japan for painting fabric) with shinshi. Shinshi are bamboo tenterhooks. Attach the tenterhooks to the selvedges of the fabric. Shinshi are also used to keep the fabric pulled tightly while stretched between harite.
Pigments or dye can be directly applied over the paste using brushes. Some pigments are not suitable because they leave a rubbery skin over the paste. Test pigments and textile paints before using. If natural dyes are used follow the notes for applying natural dyes to fabric. If using synthetic dyes, follow the instructions for the direct application of that particular dye to fabric.
If steaming is required after drying and curing the dye, remove the paste from the fabric after steaming. Remove the paste from the fabric by soaking it in water for 1/2 to 1 hour. Rinse the fabric according to the dyes that you are using. Use dish soap, Woolite or Synthrapol.
© Copyright M. Joan Lintault
Thursday, February 09, 2006
RICE PASTE RECIPE FOR STENCIL PRINTING
Subscribe to:
Post Comments (Atom)


2 comments:
can you get this
labor intensive, but very interesting
Post a Comment